General Guide To Tweaking Photos
Life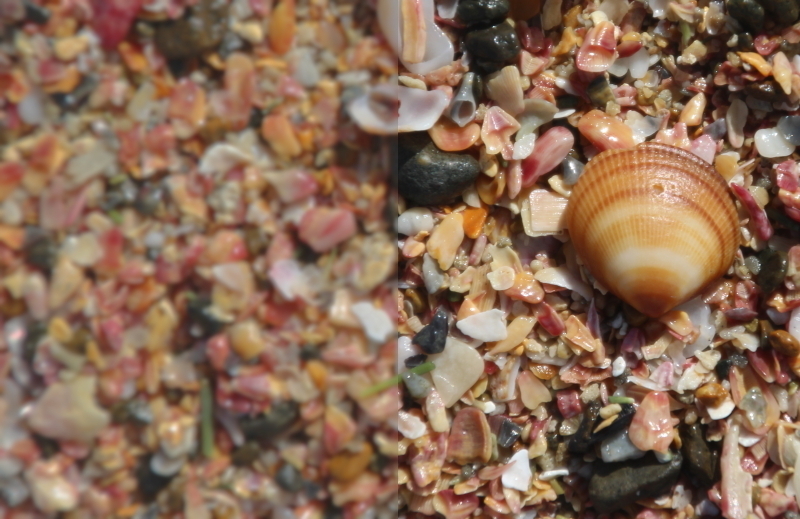
Introduction 3
Sometimes the photos that you take need to be tweaked so that it is easier to get an identification. Here are some basic tweaking tips that you can use regardless of what you are photographing that you can do in image editing software. If you do not have imaging editing software, download the GIMP, which is a free, Graphics Image Manipulation Programme. All of these instructions are for GIMP, but you will be able to do this in your programme if you already have one, you will just have to look around for the tools.
How to Sharpen a Photo 3
If your photo is a bit blury then you can sharpen it as seen in the first photo, where I sharpened the right hand side only. While there is an option to Sharpen Image I very rarely use that as Unsharp Mask gives better results. Here is how to do it.
- Open your image in the GIMP.
- From the drop down menus at the top choose Filters > Enhance > Unsharp Mask
- A box will come up and you can use the 4 way arrow to move aorund your photo and see the changes. Adjust the numbers as necessary. I usually have mine set at Radius 5.0 Amount 0.50 Threshold 0
- When you are happy with the changes click OK
- Then from the drop down menus choose File > Overwrite NAME OF YOUR IMAGE
- A box will come up and click on Export
- Now close the file. Another box wil come up saying something like "save the image before closing" or "this image has unsaved changes" - choose Discard Changes. This will not affect the image that you just exported. The reason why GIMP does this is that the file you opened was not in GIMP format and GIMP is wanting to save the file in its own format.
How to Lighten a Photo 3
If your photo is a bit dark you can lighten it as seen in the second photo where I lightened the right hand side only. While there is an option for Brightness - Contrast I very rarely use that as Auto White Balance gives better results. Here is how to do it.
- Open your image in the GIMP.
- From the drop down menus at the top choose Colours > Auto > White Balance.
- Your image will change automatically. If it is too your liking then save the image, else Ctrl + Z will undo the changes.
How to Fix Washed Out Photos 3
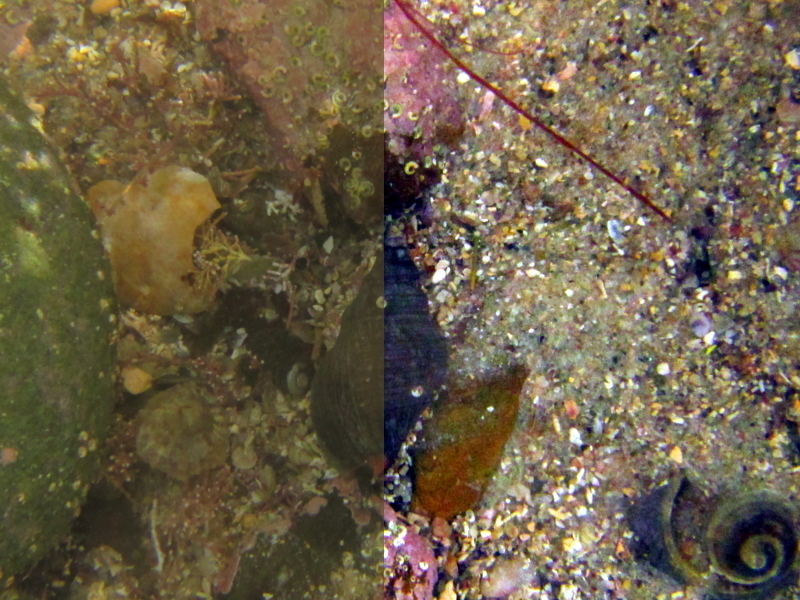
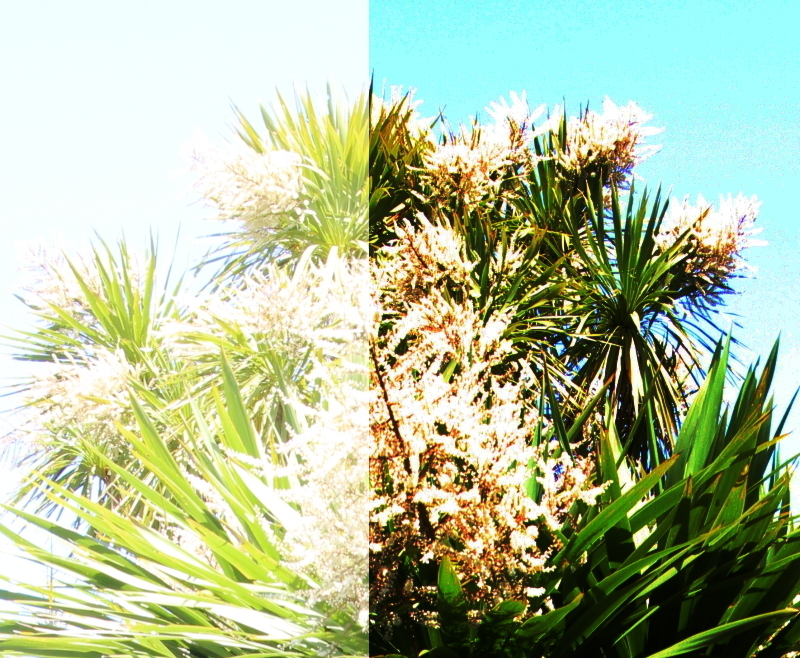
A washed out photo is usually taken in direct sunlight so that the colours of the photo appear to be washed out as seen in the left hand side on the fifth photo (scroll across to see it). Here is how to fix it.
- Open your image in the GIMP.
- From the drop down menus at the top choose Colours > Curves
- Click on the middle of the straight line and hold down the button and drag it down towards the bottom right hand corner adjusting it to how you want it. When you are happy let go of the button.
- When it is too your liking then save the image, else click cancel.
How to Crop a Photo 3
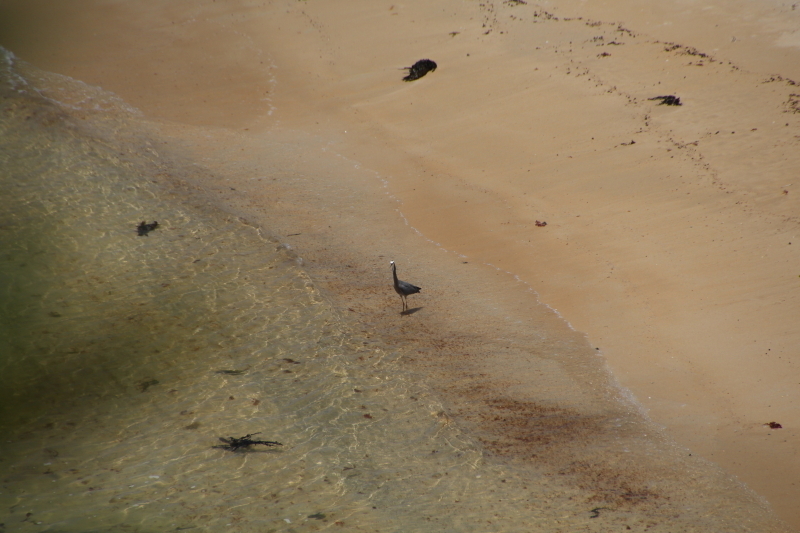
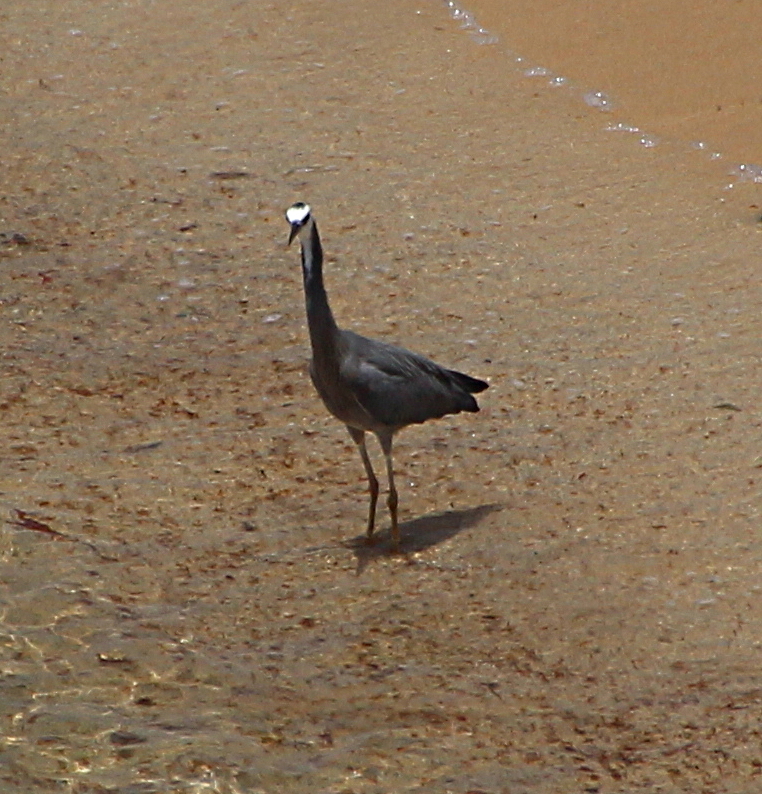
Cropping is removing all of the distractions so that people will see what what you want them to. The third photo is of bird that you can not really see wile the first photo is the crop of the bird. Here is how to do it.
- Open your image in the GIMP.
- From the drop down menus at the top choose Tools > Selection Tools > Rectangle Select
- Click where you want the top rleft hand corner of your crop to be and hold down the button. Now pull it out to the shape that you want. When you are happy let go of the button.
- From the drop down menus at the top choose Image > Crop To Selection
- If it is too your liking then save the image, else Ctrl + Z will undo the changes.
Other Photo Guides 3
- Plant Guides
- General Guide To Photographing Plants
- Photographing Ferns
- Photographing Sun Orchids
- Photographing Greenhood Orchids
- Photographing Sundews
- Photographing Searockets
- Photographing Rengarenga
- Shells and Rock Pools Guides
- General Guide To Photographing in Rock Pools
- Photographing Gastropods
- Photographing Bivalves
- Photographing Hermit Crabs
- Photographing Brittle Stars
- Photographing Octopuses
- Photographing Bluebottles
- Bird Guide
- General Guide To Photographing Birds
- Insect Guide
- Photographing Praying Mantis
Sources and Credits
- (c) tangatawhenua, all rights reserved, uploaded by tangatawhenua
- (c) tangatawhenua, some rights reserved (CC BY-NC), uploaded by tangatawhenua
- (c) tangatawhenua, some rights reserved (CC BY-SA)
More Info
iNaturalist NZ Map
| Tweaking | Crop Photos, Darken Photos, Lighten Photos, Sharpen Photos |
|---|

